
Graveyard Keeper 2 Zombie Combat: Squads, Gear, Defense Power and Every Battle
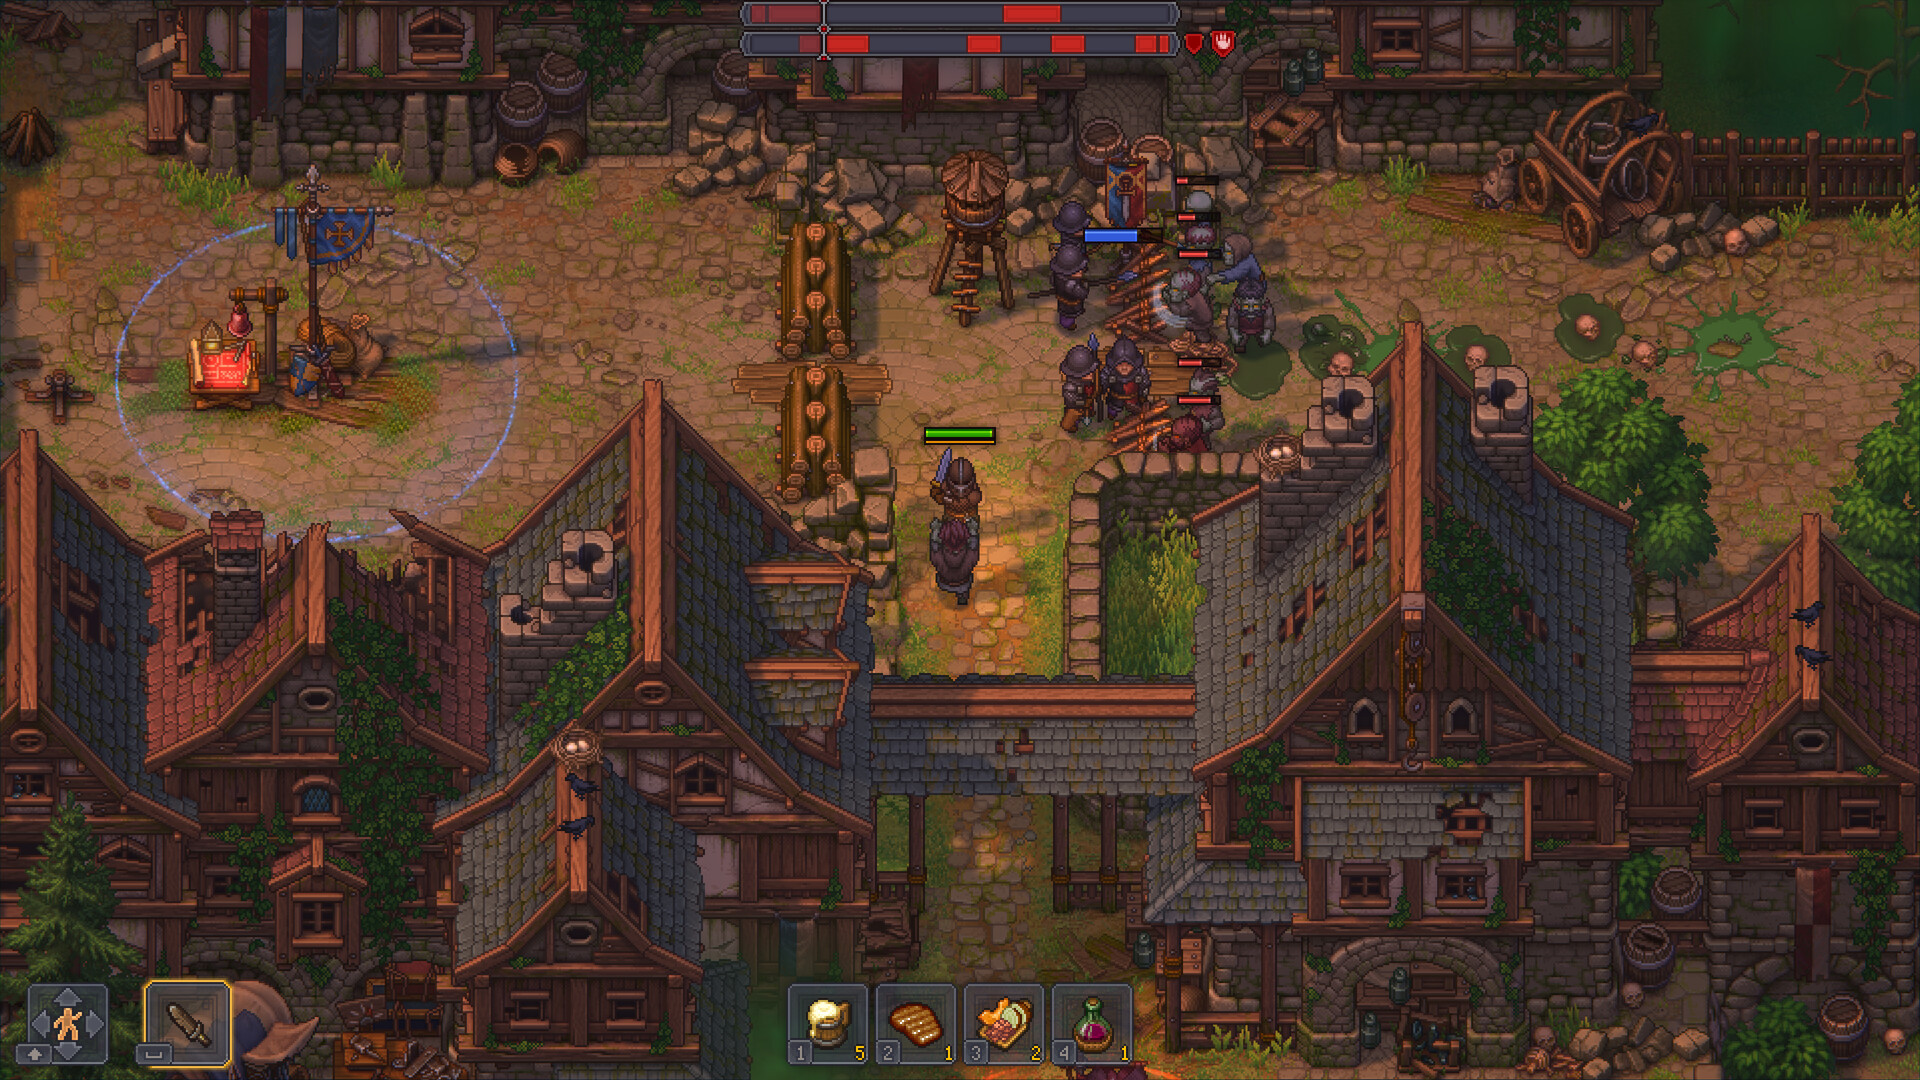
Clearing the Town in Graveyard Keeper 2 means battles: timed waves of enemy zombies against your squads, barricades and the Keeper himself. Most of the work happens before the fight — gear, defense power and the right day. This page covers all of it, with the numbers for all 17 battles.
TL;DR — Zombie combat in six lines
- A squad is 4 zombies, each with armor plus a pike or a bow. No swords.
- Defense power = barricades and towers + weapon and armor power of armed squad zombies + mercenaries.
- Most battles start on Sloth; five start on any day.
- Win by taking every enemy flag and holding them until the waves end.
- Battle Pike or Battle Bow + Iron Armor gives 16 power per squad — the mid-game standard.
- Winning zombies earn red tech points; mercenaries don't.
Part of the Corpses hub — More corpse & zombie guides · Zombies hub: unlock → work → optimize
How battles work
Herbert gives you a red banner before the first battle, and the Barracks open for squads afterwards. From then on:
- Pick the day. Most battles start only on Sloth — the fast travel guide has the weekly route.
- Meet the requirements. Each battle sets a minimum defense power and a squad limit, and hired mercenaries count as one squad.
- Fight the waves. Enemies come down one to three lines. You win by capturing every enemy flag and still holding them all when the waves run out.
- Don't lose the base. The battle ends at once if enemies take your base or the Keeper's health hits 0.
Four battles have no flags — Market Square Purge, Operation POTATO: Part II, the Final Battle and the Sewerena. There you only hold the base until the waves end.
Moving troops. One creator's walkthrough moves squads by carrying the banner forward and notes that flags only fall if you push onto them. Treat this as a player tip.
Why a battle won't start: it isn't the right day; the Keeper's tool belt lacks a sword or body armor; he carries more than one item on his head; or defense power is short.
Defense power: the number that gates every battle
| Source | Defense power |
|---|---|
| Squad zombie with armor and a pike or bow | Weapon power + armor power |
| Barricade or archer tower (not counted in Sewer Brawls) | +2 / +4 / +6 by tier |
| Mercenaries | 8, then 16 and 24 after upgrades |
A zombie missing either piece adds nothing and doesn't fight. Per zombie, gear gives:
| Loadout | Per zombie | Per squad of 4 |
|---|---|---|
| Light Pike or Reinforced Bow + Bronze Armor | 2 | 8 |
| Battle Pike or Battle Bow + Iron Armor | 4 | 16 |
| Heavy Bow or Knight's Spear + Steel Armor | 6 | 24 |
| Heavy Bow + Master Armor (if your zombies can wear it — see below) | 7 | 28 |
Squad slots come from Defender's Emblems, up to 4. You earn one each from the Port and Bathhouse Basement break-throughs, Active Scouting in the Eastern Districts, and Central Districts Purge: Part I. Patch 1.006 made emblems indestructible, because losing one could block a place.
Zombie weapons and armor
Zombie fighters have 100 health. A hit deals the attacker's damage minus the target's armor; enemy zombies wear none.
| Weapon | Damage | With zombie perk | Range | Power |
|---|---|---|---|---|
| Simple Bow | 4 | 7 (Blindseye) | 6 | +1 |
| Reinforced Bow | 8 | 11 | 6 | +1 |
| Battle Bow | 15 | 18 | 6 | +2 |
| Heavy Bow | 22 | 25 | 6 | +3 |
| Light Pike | 4 | 6 (Impaler) | 2 | +1 |
| Battle Pike | 6 | 8 | 2 | +2 |
| Knight's Spear | 10 | 12 | 2 | +3 |
Bows pause 1 s between shots; pikes 0.65 s. The Simple Pike (+1) can't be obtained in 1.007.
| Armor | Damage taken off each hit | Power |
|---|---|---|
| Rusty Armor | 0 | +0 |
| Bronze Armor | 1 | +1 |
| Iron Armor | 2 | +2 |
| Steel Armor | 3 | +3 |
| Master Armor | 4 | +4 |
The Tin Can zombie perk takes 1 more off every hit. Rusty Armor comes from the prologue and adds no power, so it only gets a zombie into a fight.
Master Armor on zombies: it needs Masterwork Equipment and Smithing 15; patch 1.007 fixed Tempering Expert unlocking Master Armor. Wikily lists it for zombie fighters, while one creator's squad video says masterwork gear isn't available to zombies. Check your Barracks before you craft it for them.
Gear recipes
| Item | Station | Ingredients |
|---|---|---|
| Light Pike | Wooden Anvil | 4 Stick, 2 Bronze Detail, 1 Bronze Ingot |
| Battle Pike | Iron Anvil | 4 Stick, 2 Iron Detail, 1 Iron Ingot |
| Knight's Spear | Steel Anvil | 4 Stick, 2 Steel Detail, 1 Steel Ingot |
| Reinforced Bow | Wooden Anvil | 1 Bronze Ingot, 10 Stick, 4 Flax Thread |
| Battle Bow | Iron Anvil | 1 Iron Ingot, 10 Stick, 6 Flax Thread |
| Heavy Bow | Steel Anvil | 1 Steel Ingot, 10 Stick, 8 Flax Thread |
| Bronze Armor | Wooden Anvil | 2 Bronze Detail, 4 Bronze Ingot, 1 Fabric |
| Iron Armor | Iron Anvil | 2 Iron Detail, 4 Iron Ingot, 2 Fabric |
| Steel Armor | Steel Anvil | 4 Steel Ingot, 4 Steel Detail, 4 Fabric |
| Master Armor | Steel Anvil | 1 Tannin Liquid, 4 Steel Detail, 6 Fabric |
Flax Thread starts in the farming guide. A Battle Bow squad uses 24 thread.
Enemies and how to answer them
| Enemy | Health | Attack | Answer |
|---|---|---|---|
| Wild Zombie | 15 | 4 | Anything; Iron Armor cuts it to 2 per hit |
| Door Zombie | 30 | 10 | Its door blocks hits from the front; flank or outlast it |
| Bucket Zombie | 35 | 6 | Pikes and towers |
| Bloated Zombie | 48 | 7 | Kill at range: it bursts for 10 on death, whatever the armor |
| Spitter Zombie | 32 | 7 | Spits from 4.5; bows (6) and towers (7) outrange it |
| Barrel Zombie | 100 | 10 | Battle or Heavy Bows and archer towers |
Barricades, towers and mercenaries
Barricades and archer towers are built in the Barracks' Military Building Area and placed from the Command post during a battle.
| Defense | Power | Health | Extra |
|---|---|---|---|
| Barricade I / II / III | +2 / +4 / +6 | 400 / 600 / 800 | — |
| Spiked Barricade I / II / III | +2 / +4 / +6 | 250 / 450 / 600 | Hits back 3 / 5 / 7 |
| Fortified Barricade I / II / III | +2 / +4 / +6 | 600 / 800 / 1000 | — |
| Archer Tower I / II / III | +2 / +4 / +6 | 150 / 300 / 450 | 8 / 16 / 24 per arrow, range 7 |
War Supplier and War Engineer improve barricades and towers.
Mercenaries are four fighters, two pikes and two bows, who take one squad slot and add 8 power. The Merc Leader upgrades them to 16 (3 Iron Ingot) and 24 (3 Steel Ingot). One payment lasts until you win a battle with them:
| Hire | Price |
|---|---|
| First | 5 silver |
| After 1 / 2 / 3 / 4 wins | 7s 50b / 10s / 15s / 20s |
| After 5 wins | 1 gold |
| After the quest Inflation | 3 gold-quality Wine |
Potions for battle
| Potion | Effect | Runes (I / II / III) |
|---|---|---|
| Healing | Keeper +20 / +40 / full health | 2 / 4 / 5 red |
| Zombie Motivator | Zombie fighters attack twice as often for 15 s / 30 s / 1 min | 1r1b / 1r2b / 3r3b |
| Damage | +3 / +6 / +9 per Keeper hit for 30 s | 1r1g / 2r2g / 3r3g |
| Berserker | Keeper attacks cost no stamina for 15 / 30 / 45 s | 1r1g1b / 2r1g1b / 3r2g2b |
Damage Potions skip zombie fighters and towers. Brew these combat potions the day before a Sloth push.
Every battle: squads and defense power
| Battle | Squads | Power | Starts |
|---|---|---|---|
| Break Through to the Port | 1 | 12 | Any day |
| Eastern Districts: Active Scouting | 1 | 12 | Sloth |
| Eastern Districts Purge | 2 | 20 | Sloth |
| Market Square Purge | 2 | 22 | Sloth |
| Central Districts Purge: Part I | 2 | 36 | Sloth |
| Central Districts Purge: Part II | 3 | 56 | Sloth |
| Closing the Western Floodgate | 3 | 56 | Sloth |
| Closing the Eastern Floodgate: Part I / II | 3 | 80 | Sloth (Part II follows) |
| Battle at the Lake | 3 | 64 | Sloth |
| Operation POTATO: Part I / II | 3 | 72 | Sloth (Part II follows) |
| Break Through to the Bathhouse Basement | 3 | 88 | Any day |
| Final Battle | 4 | 144 | Sloth |
| Sewer Brawl I / II | 1 / 2 | 8 / 24 | Any day |
| Sewerena (7 rounds) | 2–4 | 36–116 | Any day |
Rewards are mostly Zombie goo and Town Gratitude (4 in the early street battles, 8 from the floodgates through Operation POTATO, 3 in the Final Battle and sewer fights; the Bathhouse gives none). The Bathhouse, Final Battle and sewer fights also pay Keys for Looters, spent with Davy the Dagger at the Dockside Club on Lust. Patch 1.007 fixed progression in Central Districts Purge I and II.
Levelling your fighters
Fighter perks sit on the Smithing tree: Impaler and Blindseye (200 points), Tin Can and Undead Resilience (400). Red points from wins pay for them — see combat perks & mastery. Fighters don't need top bodies; the red skull guide treats soldiers as a separate goal from factory workers.
FAQ
Q: What is defense power in Graveyard Keeper 2?
A: The number next to the sword before a battle. It adds up your barricades and archer towers, the weapon and armor power of every armed squad zombie, and the mercenaries (8, 16 or 24). A battle won't start below its requirement.
Q: Which battles can I start on any day?
A: Break Through to the Port, Sewer Brawl I and II, Break Through to the Bathhouse Basement and the Sewerena. Every other battle waits for Sloth, except in the window after Herbert hands you the red banner.
Q: How do I get more squad slots?
A: With Defender's Emblems, up to 4 slots. You earn one each from the Port and Bathhouse Basement break-throughs, Active Scouting in the Eastern Districts, and Central Districts Purge: Part I.
Q: Do Damage Potions help my zombie squads?
A: No. Damage Potions only raise the Keeper's hits, plus the mercenaries' once the Merc Leader has upgraded their gear. For zombies, drink a Zombie Motivator Potion, which halves the pause between their attacks.
Q: Are mercenaries worth hiring?
A: Early, yes: 5 silver adds a full squad worth 8 defense power. The price climbs after each win with them up to 1 gold, and they take one of your squad slots and earn no tech points.
Q: Why won't my battle start?
A: Check the day, that the tool belt holds a sword and body armor, no more than one item carried on the head, and defense power at or above the requirement.
Also read
- Zombies hub — unlock, work and scale your zombies
- Zombie mastery & perks — Fighter perks and red points
- Alchemy & runes — brewing battle potions
- Fast travel — reaching battles on Sloth
- Farming — flax for bow thread
- Corpses hub — more corpse & zombie guides